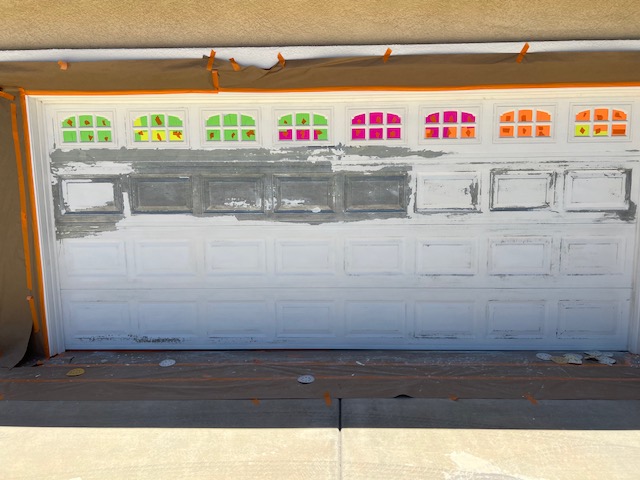
Whether you’re planning a full exterior makeover or refreshing a single room, proper surface preparation is key to achieving a smooth, durable, and long-lasting paint finish. Skipping or rushing this step can lead to peeling, bubbling, and uneven paint, especially in Southern California’s demanding climate. Here’s a guide to why and how surface preparation can make all the difference in your painting project.
1. Start with a Clean Surface
- Why It Matters: Dirt, dust, grease, and other contaminants prevent paint from adhering properly to surfaces. A clean surface ensures that paint bonds directly with the substrate, providing a uniform and resilient finish.
- Tip: Use a mild soap and water solution or a pressure washer (for exteriors) to remove dirt and grime. Allow the surface to dry completely before moving on to the next step, as residual moisture can affect paint adhesion.
2. Repair Cracks and Holes
- Why It Matters: Small cracks, holes, and surface imperfections can lead to an uneven paint job, and untreated damage can worsen over time. Repairing these issues creates a smooth surface for paint application and prevents potential issues down the line.
- Tip: Use a high-quality filler to repair any holes or cracks. Once filled, sand down the area to ensure it’s level with the rest of the wall. For exterior surfaces, pay close attention to areas where caulking may have deteriorated, as this is often a sign of aging paint and can allow moisture to seep in.
3. Sand Surfaces to Create a Smooth Base
- Why It Matters: Sanding removes old, peeling paint, smooths out rough areas, and creates a slightly rough surface that helps new paint adhere better. This step is particularly crucial if you’re painting over glossy or high-sheen surfaces.
- Tip: Use medium-grit sandpaper for rough surfaces and fine-grit sandpaper for smoothing out finishes. Always clean the area after sanding to remove dust and particles.
4. Apply a Quality Primer
- Why It Matters: Primer acts as a binding layer, helping the paint stick to the surface and providing a consistent color base. Primer is especially important when painting over bare surfaces or switching between drastically different colors.
- Tip: Choose a primer suited to your specific surface—interior, exterior, wood, or metal. Use a stain-blocking primer for areas prone to stains or discoloration. Allow the primer to dry fully before applying paint for the best results.
5. Use Painter’s Tape for Clean Lines
- Why It Matters: Painter’s tape creates sharp lines and protects areas you don’t want painted. Proper taping ensures a neat, professional look, especially around edges, trims, and windows.
- Tip: Press down the tape firmly along the edges to prevent paint from seeping underneath. Remove the tape carefully after the paint has dried to avoid pulling off any fresh paint.
6. Test Paint in a Small Area
- Why It Matters: Trying paint on a small area lets you confirm your color choice and see how it looks in the actual lighting conditions of the room or exterior. It also allows you to test for adhesion and any potential issues before committing to the entire project.
- Tip: Apply a sample of paint in an inconspicuous area, let it dry, and observe how it looks at different times of day. This will ensure you’re happy with the result before investing time and materials on a full application.
Conclusion
Surface preparation is the foundation of a successful painting project. By taking the time to clean, repair, sand, prime, and tape, you ensure a professional-looking finish that will stand the test of time. Whether you’re painting interiors or exteriors, a well-prepared surface is essential to achieving the best, longest-lasting results.

